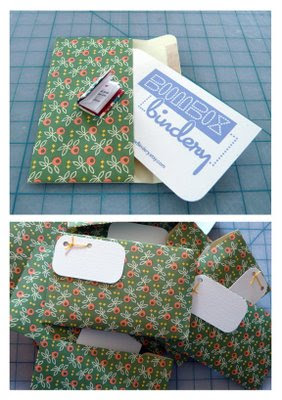
A fun and simple way to dress up a small gift or sweet note, the envelopes above were featured in my last post. I made them in both a vertical & horizontal format with the sealing flap on either a short or long end of the envelope. The images below depict the making of the vertical variety.
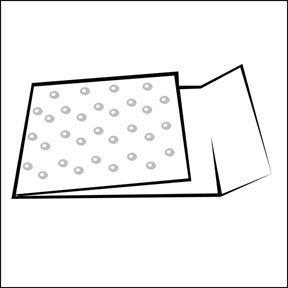
Cut a strip of decorative paper that will be long enough to envelop your gift, and wide enough to include a strip of adhesive on either side. Make sure to leave enough overlap in the length to allow for adhesive on the flap, in my case a strip of thin double stick tape. Fold the paper as shown above.
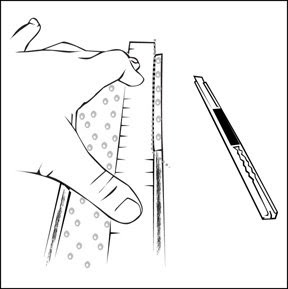
Lay strips of double sided tape along the edges of the the fold opposite the flap. I prefer 3m #415. It comes in a variety of thicknesses, I find 1/4" to be very useful. One of great things about this tape is that it comes with a backing. This backing adds an extra thickness to the tape, against which a straight edge can be positioned, as in the image above. Cut a strip away as indicated by the gray dotted line. Do this on both sides.
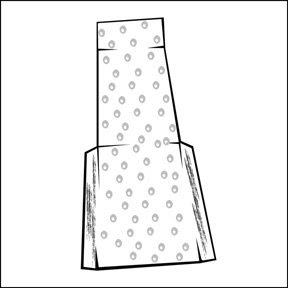
Your paper should look like this. Fold the taped strips under and then form the envelope by peeling off the backing and folding the sides together.
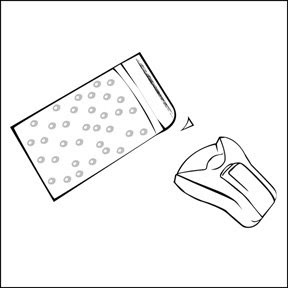
Rounding the corners of the flap is a nice touch. Either trace around a coin and cut the corner off, or use a corner punch for a nice swift job! Add another strip of adhesive to the edge of the flap.
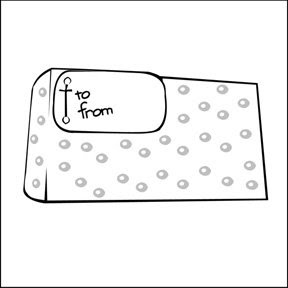
The final touch is to add a tag to the front of the envelope. Slip a hole puncher through the opening of the envelope and punch through both the tag and the decorative paper. Secure the tag to the envelope with thread or thin ribbon.