This is my entry for the 2009 Designer Bookbinders International
Competition. I completed it this past August and sent it over to Oxford in November. Confirmation was received that it made it to England in one piece, and now it's time to sit back and wait for the judging, which will take place in January.
I was trained in the English tradition at
North Bennet Street School by
Mark Andersson and
Jeff Altepeter. While studying at the
Uppsala University Library Bindery I was able to learn about the French tradition from Adam Larsson.

Tradition calls for sawn in cords, but we decided it would be nice if this book actually opened, so it is sewn in more of an English style on separated cord, flat against the spine.
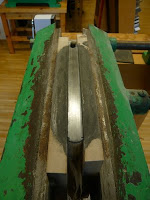
Graphite top edge. From some angles looks like a regular graphite edge, and from other angles shows the wave pattern made with my thumb that mimics the theme and pattern on the book.
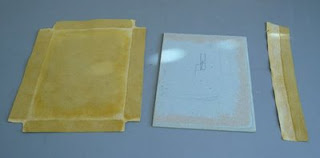
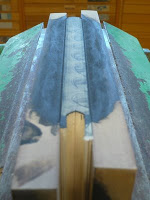
Beveled Boards and Paring to match. I tried everything out on multiple plaquettes before the real deal!

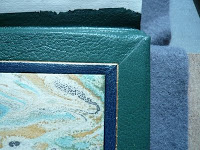
As one can see in the paring example above, the corners are very interesting. Two turn-ins come together and meet at a bevel while the little tab at the corner comes up over the board and is pleated on top of the previously met turn-ins. Make sense? After all that, pare a piece of matching leather to less than zero and paste it on top of it all! The listile can also be seen in this image.

This is where I stood during gold tooling. I had everything I needed at my finger tips. My wave pattern was made up of four different gouges that I used at steady intervals. I really enjoyed having all of my tools hot at the same time. It made for a smooth work time, not having to stop and re-heat each tool. There wasn't any vaseline available to put on my cotton for picking up the gold, so I just used the oil from my forehead and have decided that I prefer it. Authentic, one might say. The oil is lighter than the vaseline, which just seems appropriate when dealing with delicate gold leaf.
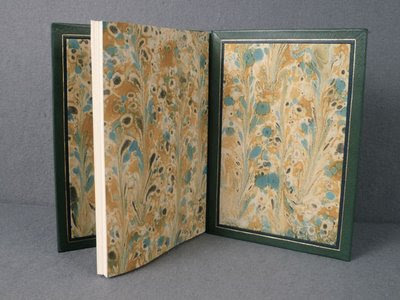
Gold Tooled Listile. This can have many variations. Multiple tooled lines, or different materials for the central portion. I used a Swedish marbled paper from the Uppsala collection. Suede, or leather is often used in that area. There is a natural recess in the central area because of the full thickness turn-ins. I folded the marbled paper around a card (about 20pt or so) and adhered it on the back side. I think that the leather border is technically the listile regardless of what is contained in the central portion. Creating the border with ultra-thin leather and then tooling it (blind and gold) was my favorite part of this binding. This image shows the side closest to the spine and how the fourth side is added and adhered to the end sheet.
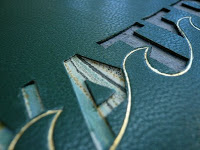
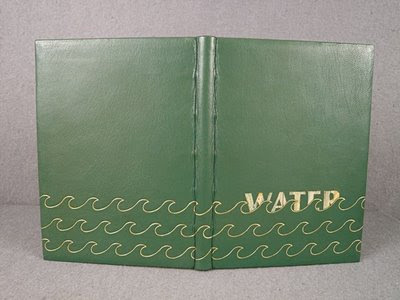
I experimented quite a bit and came up with a fun new technique. I wanted to incorporate a glassy sheen on the cover somehow. I cut out my letter-forms from the leather after covering and tooling the book. I cut matching shapes out of the same marbled paper used on the interior. The marbled paper was glued into place with PVA.

Initially I thought that epoxy would be the perfect thing for my glassy sheen, however, it dried with a milky finish. PVA achieved the desired result, but over time I knew that its reaction to pressure and temperature might prove fatal for the binding. Bosse Carlsson recommended super glue, the main ingredient in super glue is acrylic resin, that sounded promising, and it was! The final result was achieved by applying a layer of PVA with a top sealing coat of acrylic resin.
A total of 500 sets of sheets were printed. I'm not sure how many entrants there were in total, but 125 of the books will be displayed at the Bodleian Library with their "1000 Years of Bookbinding" exhibition and will then be part of a traveling exhibition to the states. I've seen Adam's entry and am looking forward to seeing John Nove's. I'm not sure if I know any of the other binders who have entered, but I'm definitely glad that the entry fee includes a catalog! I can't wait to see all of them.
 Josh and I drove up to Northern Georgia last month to be with his family for Easter and my birthday weekend. During our trip we got to spend a bit of time in the attic looking through his childhood, and high school belongings, as well as boxes that we had both stored there after college. I was excited to find a few gift books that I made for Josh during our dating years!
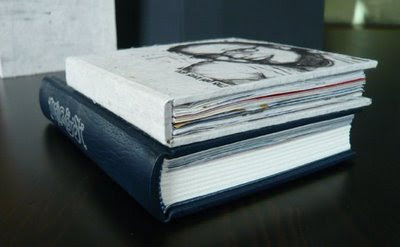
 The book in these photos is the first one I made for him. The image on the front was xerox copy of an image printed in reverse. I used a transfer marker to "print" it on the front cover.
 A lovely title page made with my treasured label gun. So treasured because of the fond memories I have using one for the first time with my Grandpa Houston in his tidy garage.
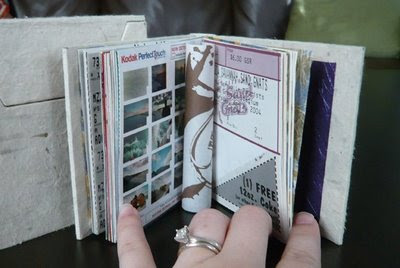 The pages are all pieces of evidence from our time spent together! Pictured here, the Kodak proof page from a day on Tybee Island, a piece of paper bag from a music store, a ticket to a Sand Gnats baseball game.
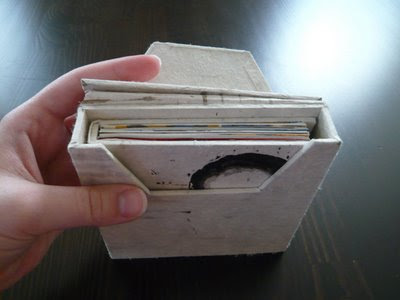 Although still in working order, the box needs to be handled gently. I had yet to learn about different paper strengths.
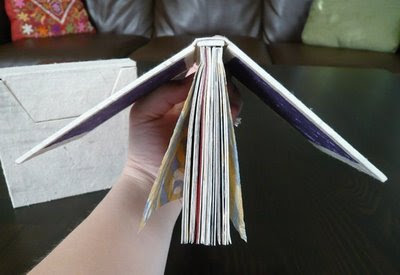 An interesting and sturdy binding that I'm not likely to repeat! The pages (copy paper, cardstock, handmade paper, napkins, brochures, tickets, & thin plastic film) were all cut to the same size and then sewn in a straight line up the side of the pages. Similar to a Japanese stab binding without any oversewing. I cut a piece of board to match the height and thickness of the book to form a spine which was adhered to a wide strip of paper. That wide strip was then glued to the first and last pages, which is what holds the whole thing together! You can also see in the photo that the spine is glued into the cover which performs a very minor function in the binding.
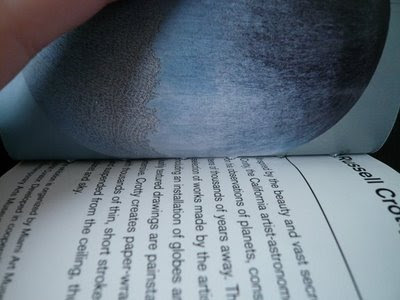 The sewing stations can be seen in this closeup of a Russell Crotty spread. We saw his globes at the Miami Art Museum during our 2004 Alternative Spring Break trip.
 I am reminded of a paper I once wrote on the importance of the book in Roman Art and Architecture. I'm thinking less about how the books (scrolls, or substrates) were a representation of knowledge and power, and more about how they were a constant theme that manifested in different forms throughout the history of the Roman Empire. Now, I'm not saying that our relationship is at all like the Roman Empire . . . but Josh and I have certainly placed importance in books throughout our time together.
 The second book in these photos is a beautiful book that Josh collaborated on with my friend and fellow NBSS alumna, Wendy Withrow. You can see other shots of Josh's proposal book on her website, here. Note the differences in craftsmanship. The pairing of the two is so pleasing, because, although I didn't make the second book, I shared training with the woman who did, and it is a clear snapshot of my personal bookbinding history. It's a pretty good snapshot of J & M history too, but I'll stick to the books on this blog.